Understanding the Essential Components of Vehicle Starting Systems
The starter solenoid serves as a crucial component in any vehicle's starting system, acting as both an electrical switch and a mechanical device that engages the starter motor with the engine's flywheel. This comprehensive guide will walk you through everything you need to know about starter solenoid wiring, from basic principles to advanced troubleshooting techniques.
Whether you're a professional mechanic or a DIY enthusiast, understanding how to properly wire a starter solenoid is essential for maintaining and repairing vehicle starting systems. The proper connection ensures reliable starting performance and prevents potential damage to your vehicle's electrical system.
Fundamentals of Starter Solenoid Wiring
Basic Wiring Configuration
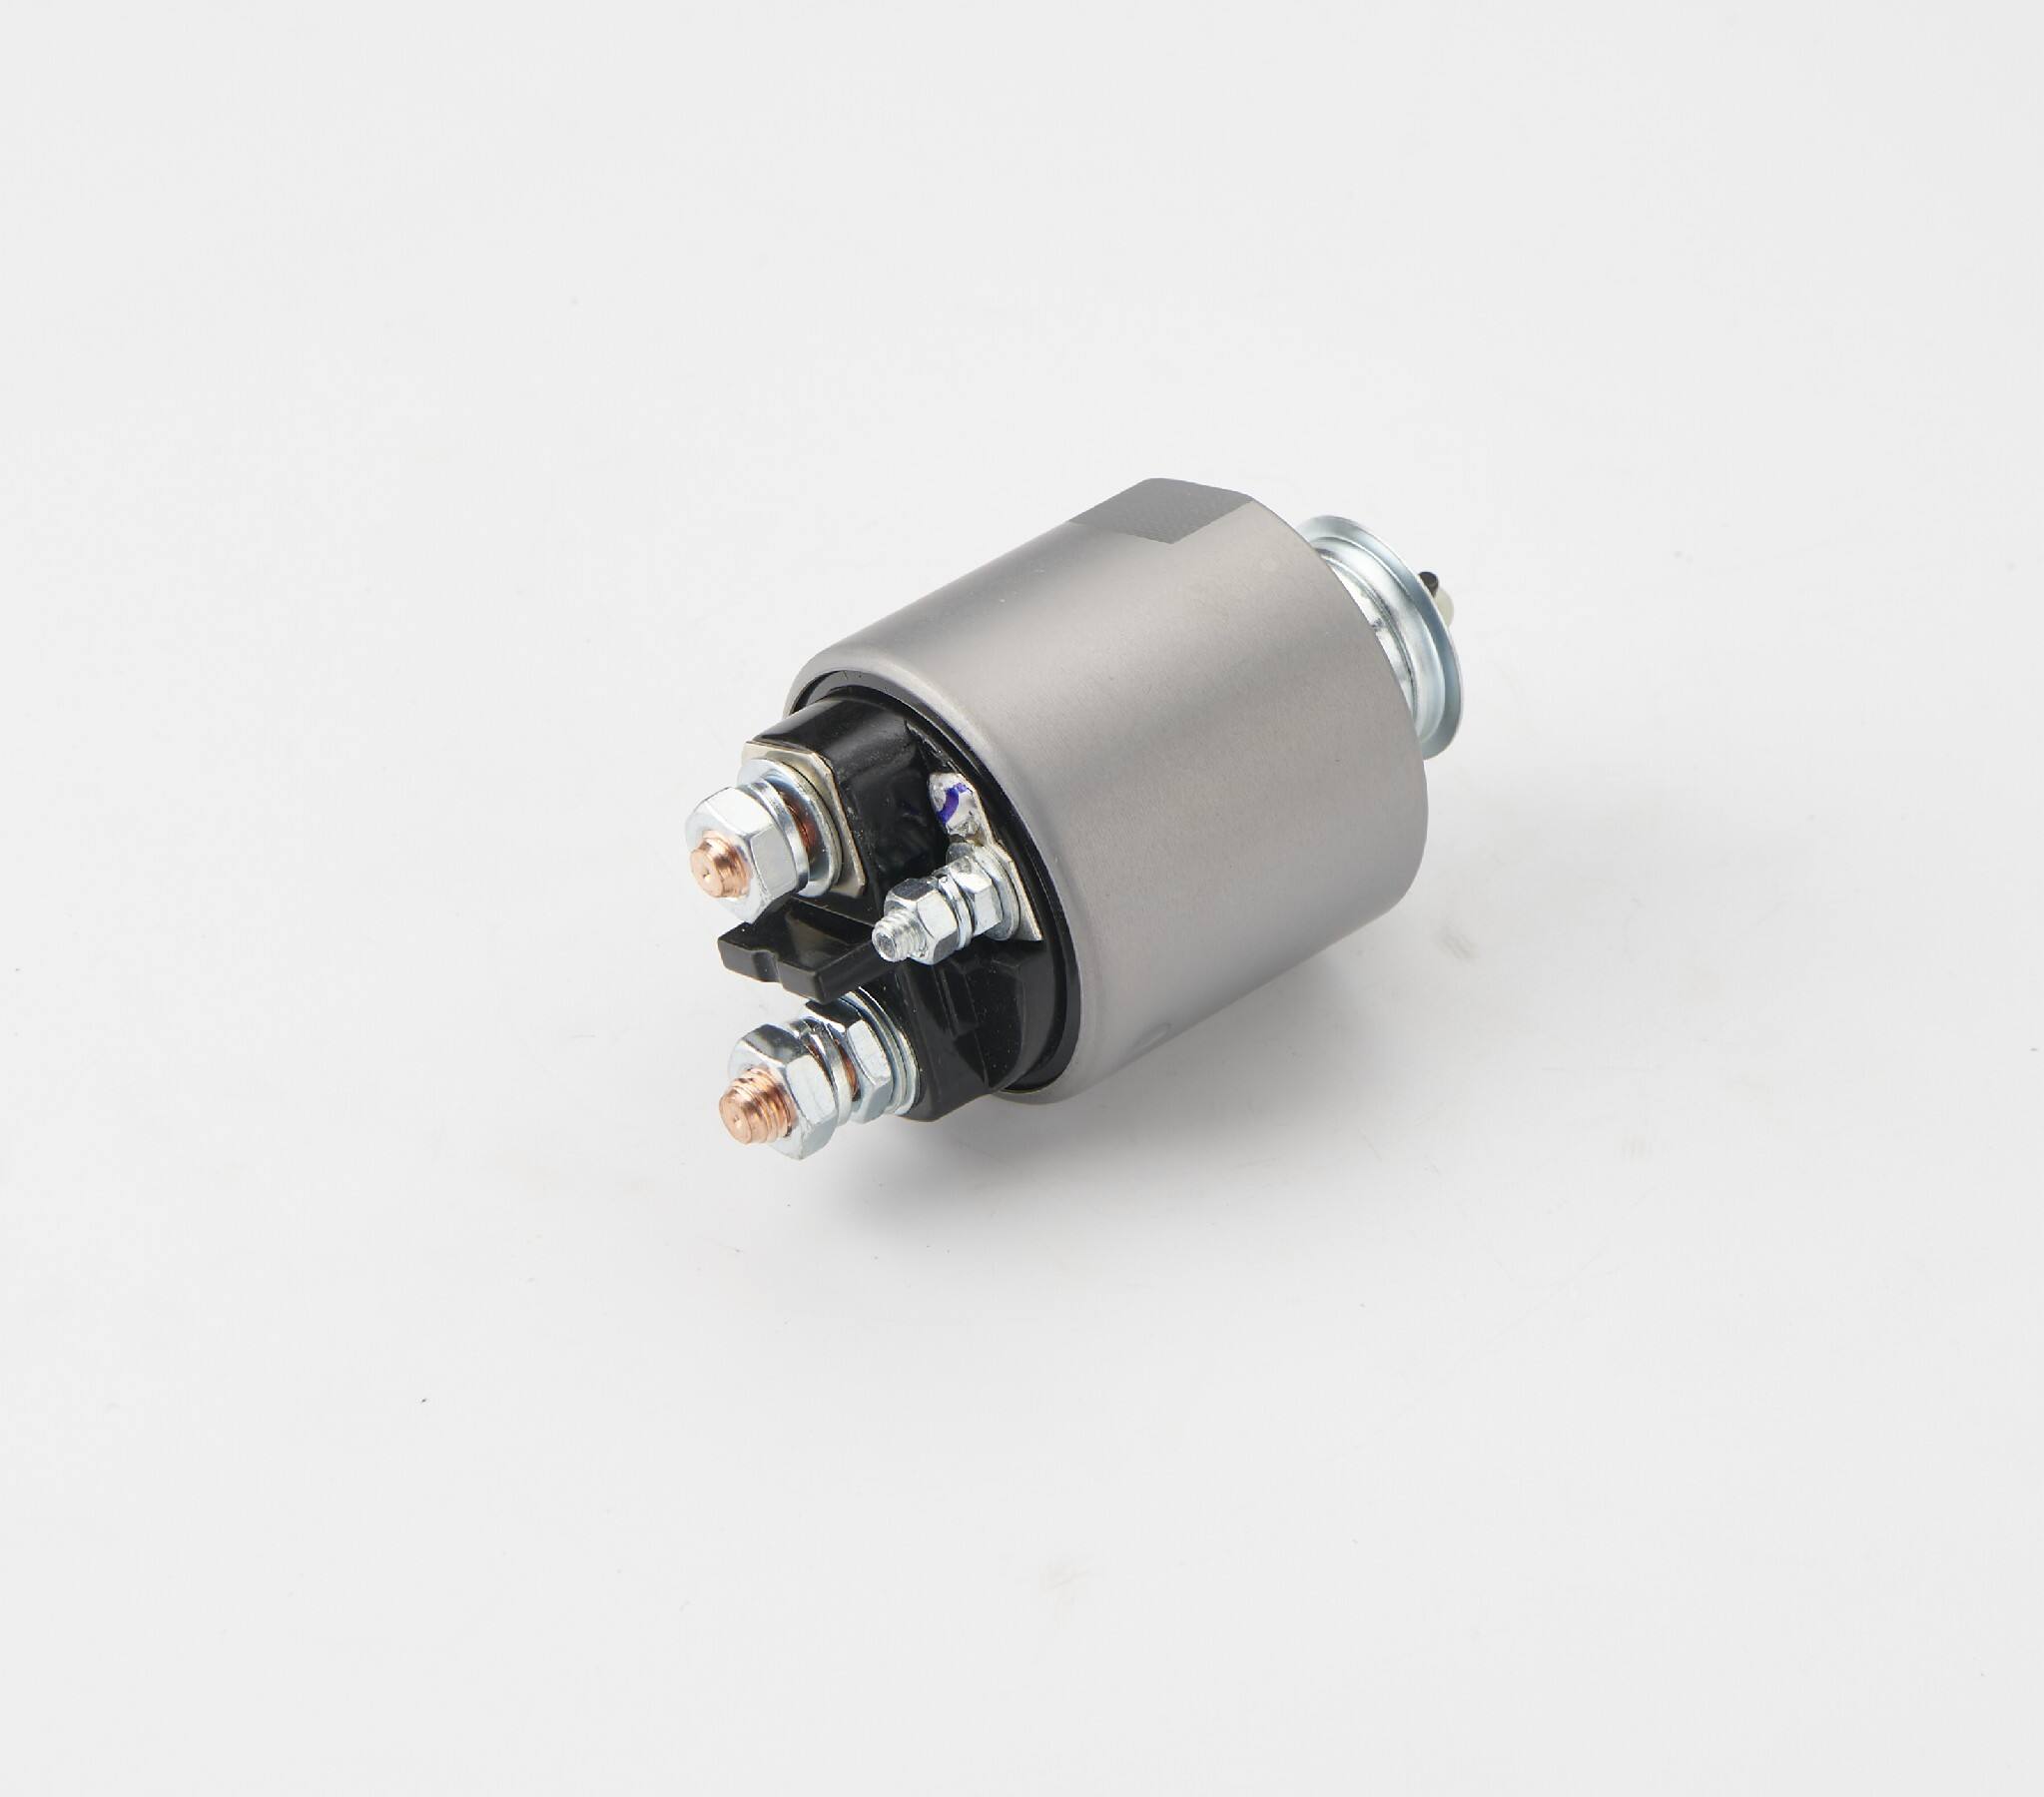
The starter solenoid typically has three or four terminals, each serving a specific purpose in the starting circuit. The main power terminal connects directly to the battery's positive terminal, while the control terminal receives the signal from the ignition switch. The output terminal connects to the starter motor, completing the high-current circuit necessary for engine cranking.
Understanding the color coding and terminal markings is crucial for proper installation. Most starter solenoids use standardized markings: 'BAT' for battery connection, 'S' for switch connection, and 'M' for motor connection. Some models may also include an additional ground terminal marked 'G' or 'GND'.
Terminal Identification and Connections
Each terminal on the starter solenoid requires specific wire gauge sizes to handle the electrical load safely. The main power and motor terminals typically use heavy-gauge cables (usually 4 to 2 AWG) due to the high current flow during starting. The control wire from the ignition switch can be smaller (typically 14 to 12 AWG) as it carries only the activation current.
Proper terminal preparation and connection techniques are essential for reliable operation. All terminals should be clean, free of corrosion, and securely fastened. Using appropriate ring terminals and heat-shrink tubing helps ensure long-lasting, weather-resistant connections.
Installation Best Practices
Mounting and Positioning
The starter solenoid must be mounted securely in a location that protects it from excessive heat and moisture. Most vehicles have a designated mounting position near the starter motor, but custom installations may require careful planning to ensure proper functionality and accessibility for maintenance.
When mounting the starter solenoid, ensure adequate clearance for all connecting cables and verify that the mounting surface provides good electrical grounding if required by the specific model. The solenoid should be oriented to prevent water accumulation around the terminals.
Cable Routing and Protection
Proper cable routing is critical for long-term reliability. All wires should be secured away from moving parts, heat sources, and sharp edges. Use appropriate cable ties and protective loom to prevent chafing and maintain professional appearance. Allow sufficient slack in the cables to accommodate engine movement without straining the connections.
High-quality cable protection includes using split loom tubing in areas exposed to heat or mechanical wear, and installing rubber grommets where cables pass through metal panels. These precautions prevent short circuits and extend the life of the wiring system.
Testing and Troubleshooting
Voltage Testing Procedures
Regular testing helps identify potential issues before they cause starting problems. Using a digital multimeter, check for proper voltage at all terminals during operation. The main power terminal should show battery voltage (typically 12.6V when fully charged), and the control terminal should show voltage only when the ignition switch is in the start position.
Voltage drop testing across the starter solenoid connections can reveal high-resistance problems that may affect starting performance. The voltage drop should not exceed 0.5V across any connection during cranking.
Common Issues and Solutions
Starter solenoid problems often manifest as clicking sounds, slow cranking, or no response when turning the key. Systematic testing can identify whether the issue lies with the solenoid, connections, or related components. Corroded terminals, loose connections, and damaged wiring are common culprits that require immediate attention.
Regular maintenance, including cleaning terminals and checking connection tightness, can prevent many common problems. When replacing a starter solenoid, always verify the replacement unit's specifications match the original to ensure proper operation.
Advanced System Integration
Security System Integration
Modern vehicles often incorporate security features that interact with the starter circuit. Understanding how to properly integrate the starter solenoid wiring with immobilizer systems and anti-theft devices is crucial for maintaining vehicle security while ensuring reliable starting operation.
When adding aftermarket security systems, careful attention must be paid to the starter solenoid control circuit to prevent interference with factory security features. This may require additional relays or modules to maintain proper functionality.
Remote Start Compatibility
Remote start systems require careful integration with the starter solenoid circuit. Additional control modules and safety interlocks must be properly wired to prevent dangerous situations such as engaging the starter while the engine is running. Professional-grade remote start installations include multiple safety features and diagnostic capabilities.
The starter solenoid wiring must accommodate both manual and remote activation while maintaining all factory safety features. This often involves adding duplicate control circuits with appropriate isolation to prevent electrical feedback between systems.
Frequently Asked Questions
How can I identify a faulty starter solenoid?
A faulty starter solenoid typically exhibits symptoms such as clicking sounds when turning the key, intermittent starting problems, or complete failure to start. You may also notice burned terminals, corroded connections, or a burning smell during starting attempts. Professional testing with a multimeter can confirm solenoid functionality.
What wire gauge should I use for starter solenoid connections?
For the main power and motor connections, use 4 AWG to 2 AWG cables depending on the starter's current draw and cable length. The control wire from the ignition switch can use 14 AWG to 12 AWG wire. Always follow manufacturer specifications and consider voltage drop when selecting wire sizes.
How often should starter solenoid wiring be inspected?
Regular inspection of starter solenoid wiring should be performed at least annually or every 12,000 miles, whichever comes first. More frequent inspections are recommended in harsh environments or high-use applications. Look for signs of wear, corrosion, loose connections, and damaged insulation during each inspection.