EN
EN



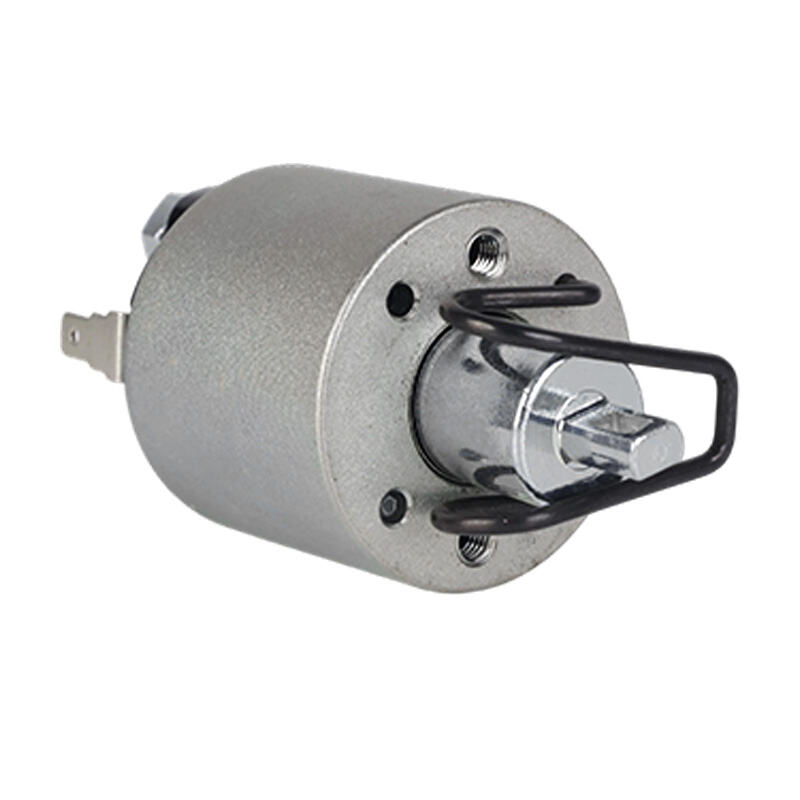
The 12v starter solenoid serves as a critical electrical switch in your vehicle's starting system, acting as the bridge between your ignition switch and the starter motor. When you turn the key or push the start button, this electromagnetic device receives a low-current signal from the ignition system and uses it to close heavy-duty contacts that deliver high current from the battery to the starter motor. Understanding how this essential component functions can save you time, money, and frustration when diagnosing starting problems in your vehicle.
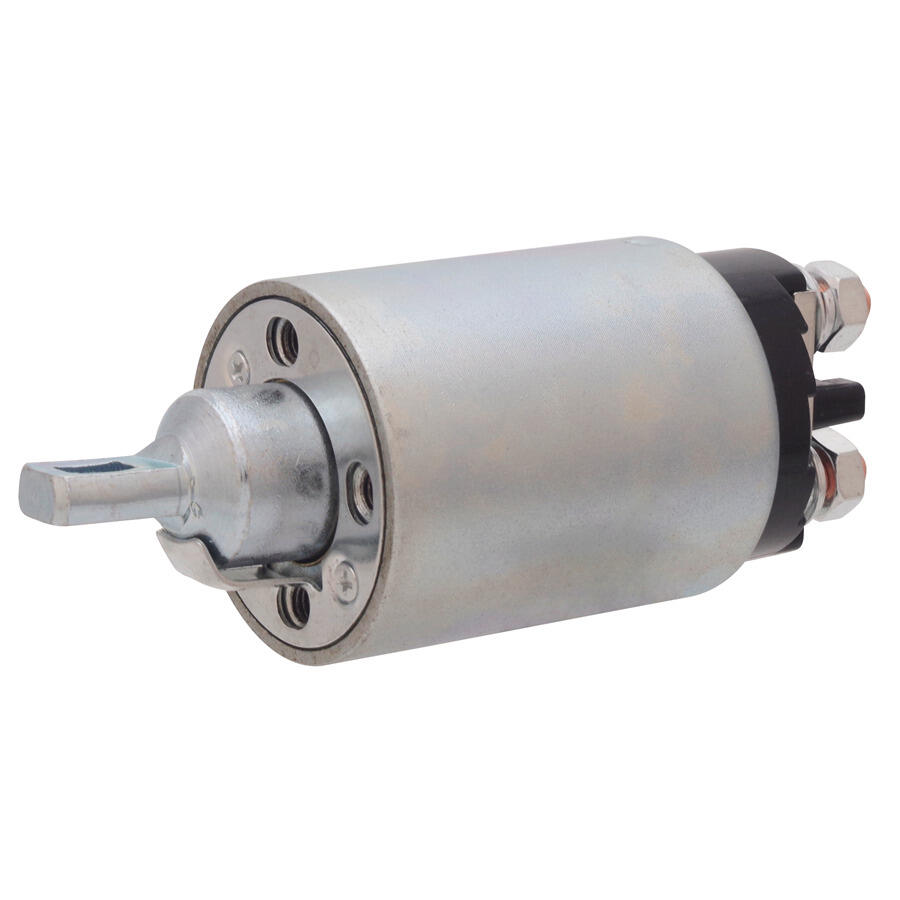
Understanding the Function of a 12V Starter Solenoid
Basic Operating Principles
A 12v starter solenoid operates on electromagnetic principles, utilizing a coil of wire wrapped around an iron core to create a magnetic field when energized. This magnetic field pulls a plunger mechanism that physically connects two heavy-duty electrical contacts, completing the circuit between the battery and starter motor. The solenoid requires only a small current from the ignition switch to control a much larger current flow to the starter, making it an efficient switching device that protects your ignition system from high amperage loads.
The internal construction of a 12v starter solenoid includes several key components that work together seamlessly. The electromagnet coil creates the magnetic force necessary to move the plunger, while heavy copper contacts handle the high current flow to the starter motor. Spring mechanisms ensure proper contact pressure and return the plunger to its rest position when the ignition is turned off, breaking the connection and stopping current flow to the starter.
Role in the Starting System
Within the complete starting system, the 12v starter solenoid acts as the final control element before power reaches the starter motor. When you engage the ignition, the solenoid receives a signal through the starter relay and safety switches such as the neutral safety switch in automatic transmissions or clutch safety switch in manual transmissions. This multi-layered safety approach ensures that the starter only engages when conditions are appropriate for safe engine starting.
The positioning of the 12v starter solenoid varies depending on vehicle design, but it typically mounts either directly on the starter motor housing or separately on the firewall or fender well. Remote-mounted solenoids offer easier access for testing and replacement, while starter-mounted units provide a more compact installation that reduces the length of high-current cables required for operation.
Common Signs of 12V Starter Solenoid Failure
Electrical Symptoms
Electrical failures in a 12v starter solenoid manifest in several distinct ways that experienced technicians recognize immediately. A clicking sound when attempting to start the engine often indicates that the solenoid coil is functioning but the heavy-duty contacts have failed or become corroded. This clicking occurs because the electromagnet pulls the plunger, but insufficient contact pressure prevents proper current flow to the starter motor.
Complete electrical silence when turning the ignition key suggests either a failed solenoid coil or an interruption in the control circuit leading to the 12v starter solenoid. In some cases, you may observe dashboard lights dimming significantly when attempting to start, which can indicate stuck solenoid contacts that create a continuous high-current draw even when the ignition key returns to the run position.
Mechanical Indicators
Mechanical problems with a 12v starter solenoid often produce intermittent starting issues that can be particularly frustrating to diagnose. Worn or damaged plunger mechanisms may not provide consistent contact pressure, resulting in successful starts on some attempts while failing completely on others. Temperature changes can exacerbate these mechanical issues, with cold weather often making problems more pronounced due to increased resistance in electrical connections.
Physical inspection of the solenoid housing may reveal signs of overheating, corrosion, or physical damage that compromise its operation. Burned or melted plastic components indicate excessive current flow, possibly due to stuck contacts or an overloaded starting system that places excessive demands on the 12v starter solenoid during operation.
Essential Tools for Testing a 12V Starter Solenoid
Basic Testing Equipment
Proper testing of a 12v starter solenoid requires specific tools that ensure both accuracy and safety during the diagnostic process. A quality digital multimeter capable of measuring both voltage and resistance forms the foundation of any electrical testing toolkit. Choose a meter with appropriate safety ratings and clear display features that allow accurate readings in various lighting conditions commonly encountered in automotive repair environments.
Test leads with sharp, clean probes are essential for making reliable electrical connections during 12v starter solenoid testing procedures. Invest in leads with adequate current ratings and proper insulation to handle the voltages present in automotive electrical systems. Some technicians prefer test leads with alligator clips that provide hands-free operation during complex testing sequences.
Safety Equipment and Preparation
Safety considerations during 12v starter solenoid testing cannot be overstated, as automotive electrical systems present multiple hazards including electrical shock, short circuits, and potential fire risks. Always disconnect the negative battery terminal before beginning any electrical testing to prevent accidental shorts or unwanted starter engagement during the testing process. Use insulated tools and wear safety glasses to protect against potential sparks or debris.
Proper lighting and workspace organization contribute significantly to safe and effective testing procedures. Ensure adequate illumination of the work area and organize tools within easy reach to minimize the need for awkward positioning that could lead to accidental contact with electrical components. Keep a fire extinguisher rated for electrical fires nearby when working with automotive electrical systems.
Step-by-Step 12V Starter Solenoid Testing Procedures
Visual Inspection Methods
Begin your 12v starter solenoid diagnosis with a thorough visual inspection that can reveal obvious problems before proceeding to electrical testing. Examine all electrical connections for signs of corrosion, looseness, or physical damage that could affect solenoid operation. Pay particular attention to the large battery cables and smaller control wires, as corrosion at these connection points commonly causes starting problems that mimic solenoid failures.
Look for evidence of overheating on the solenoid housing, such as discolored metal, melted plastic, or burned insulation materials. These signs indicate excessive current flow or poor connections that generate heat during operation. Document any physical damage or wear patterns that could provide clues about the root cause of the starting system problem.
Electrical Testing Techniques
Electrical testing of a 12v starter solenoid follows a logical sequence that isolates individual components to identify the source of failure. Start by measuring battery voltage at the solenoid input terminal with the engine off and all accessories disabled. A fully charged automotive battery should read approximately 12.6 volts, and any significant deviation from this value indicates battery or charging system problems that must be addressed before continuing solenoid testing.
Test the control circuit by measuring voltage at the small terminal on the 12v starter solenoid while an assistant operates the ignition switch. This terminal should receive full battery voltage when the key is in the start position, confirming proper operation of the ignition switch, starter relay, and associated safety switches. Absence of voltage at this terminal indicates problems in the control circuit rather than solenoid failure.
Continuity testing between solenoid terminals provides valuable information about internal contact condition and coil integrity. With the battery disconnected and solenoid removed from the vehicle, use your multimeter to check resistance between the small control terminals and between the large power terminals. A functioning solenoid coil typically shows resistance between 2 and 5 ohms, while infinite resistance indicates an open coil that requires replacement.
Interpreting Test Results and Diagnosis
Understanding Voltage Readings
Proper interpretation of voltage readings during 12v starter solenoid testing requires understanding the expected values and their significance in the overall starting system. Battery voltage should remain relatively stable during testing, with only minor drops acceptable under load conditions. Significant voltage drops during starter engagement often indicate high resistance connections, corroded terminals, or inadequate battery capacity rather than solenoid problems.
Control circuit voltage measurements provide crucial diagnostic information about the switching function of the 12v starter solenoid. Full battery voltage at the control terminal during start attempts confirms proper signal delivery, while reduced voltage suggests resistance problems in the control circuit wiring. Zero voltage at the control terminal directs attention to switches, relays, or wiring problems upstream from the solenoid.
Resistance and Continuity Analysis
Resistance measurements of the solenoid coil offer insights into the electromagnetic portion of the 12v starter solenoid that may not be apparent through voltage testing alone. Coil resistance significantly higher than specification suggests partial winding failure or corrosion within the coil assembly. Conversely, very low resistance readings may indicate shorted windings that could cause excessive current draw and premature failure of other electrical components.
Continuity testing between heavy-duty terminals reveals the condition of the main switching contacts within the solenoid. These contacts should show zero resistance when manually activated and infinite resistance when at rest. Any measurable resistance in the closed position indicates contact wear or contamination that will cause voltage drops and poor starter performance.
Troubleshooting Common Issues
Intermittent Problems
Intermittent failures of a 12v starter solenoid present unique diagnostic challenges that require systematic approaches to identify the underlying cause. Temperature-related problems often manifest as successful starts when cold but failures after the engine has warmed up, or vice versa. These thermal effects typically result from expansion and contraction of internal components that affect contact pressure or coil resistance values.
Vibration-induced intermittent failures can be particularly elusive, as the problem may not occur during static testing but only appear under actual operating conditions. Road testing or intentionally introducing vibration during testing can sometimes reproduce these conditions and reveal loose connections or worn components within the 12v starter solenoid assembly.
Complete Failure Scenarios
Complete failure of a 12v starter solenoid typically results from catastrophic internal damage that permanently disables the switching function. Open coil windings prevent the electromagnetic operation necessary to close the main contacts, while welded or severely corroded main contacts may prevent proper circuit completion to the starter motor. These failures usually require complete solenoid replacement rather than repair attempts.
External factors can also cause complete solenoid failure, including overvoltage conditions from faulty voltage regulators or jump-starting procedures with incompatible equipment. Physical damage from road debris, corrosion, or improper installation techniques may compromise the solenoid housing and expose internal components to contamination that causes permanent failure.
Replacement and Maintenance Tips
Selection Criteria for New Solenoids
Selecting an appropriate replacement 12v starter solenoid requires careful attention to electrical specifications, mounting configuration, and terminal arrangements that match your specific vehicle application. Amperage ratings must meet or exceed the original equipment specifications to handle the current demands of your starter motor safely. Insufficient current capacity leads to premature failure and potential safety hazards during operation.
Physical mounting considerations include bolt patterns, overall dimensions, and terminal orientations that must align with existing wiring harnesses and mounting brackets. Many vehicles use specific solenoid designs that integrate with other starting system components, making universal replacements unsuitable despite similar electrical ratings. Always verify part numbers and application compatibility before installation.
Installation Best Practices
Proper installation of a replacement 12v starter solenoid begins with thorough cleaning of all electrical connections and mounting surfaces to ensure optimal conductivity and secure attachment. Apply dielectric grease to terminal connections to prevent corrosion and maintain long-term reliability. Torque all connections to manufacturer specifications to prevent loose connections that cause voltage drops and heating problems.
Route control wiring carefully to avoid sharp edges, heat sources, or moving components that could damage the insulation and cause short circuits. Secure all wiring with appropriate clips or ties to prevent chafing and maintain proper positioning throughout the vehicle's service life. Test the complete starting system after installation to verify proper operation and identify any remaining issues that require attention.
FAQ
How long does a 12v starter solenoid typically last
A quality 12v starter solenoid typically lasts between 100,000 to 150,000 miles under normal operating conditions, though this can vary significantly based on usage patterns, environmental factors, and maintenance practices. Vehicles subjected to frequent short trips, extreme temperatures, or corrosive environments may experience shorter solenoid life due to increased stress on electrical components. Regular maintenance and proper battery care can extend solenoid life by reducing electrical stress and preventing premature wear of internal components.
Can I bypass a faulty 12v starter solenoid temporarily
While it is technically possible to bypass a faulty 12v starter solenoid using jumper wires or a screwdriver to manually bridge the contacts, this practice is extremely dangerous and not recommended except in emergency situations. Bypassing removes important safety features built into the starting system and creates risks of electrical shock, fire, or unwanted starter engagement. If bypass becomes necessary, ensure the transmission is in park or neutral, disconnect the ignition coil to prevent engine starting, and use proper insulated tools while maintaining safe positioning away from moving parts.
What causes a 12v starter solenoid to fail prematurely
Premature failure of a 12v starter solenoid often results from electrical stress caused by weak batteries, corroded connections, or starter motor problems that increase current draw. Heat buildup from poor connections or excessive cycling can damage internal components and reduce service life significantly. Environmental factors such as moisture intrusion, road salt exposure, or physical vibration can also accelerate wear and cause early failure. Proper maintenance of the entire starting system helps prevent these conditions and maximize solenoid longevity.
Is it safe to test a 12v starter solenoid while installed in the vehicle
Testing a 12v starter solenoid while installed in the vehicle is generally safe when proper precautions are followed, including disconnecting the battery negative terminal and ensuring the transmission is in park or neutral with the parking brake applied. However, some tests require solenoid removal to access all terminals and prevent unwanted starter engagement during testing procedures. Always follow manufacturer safety guidelines and use appropriate personal protective equipment when working with automotive electrical systems to minimize risks of injury or component damage.
Table of Contents
- Understanding the Function of a 12V Starter Solenoid
- Common Signs of 12V Starter Solenoid Failure
- Essential Tools for Testing a 12V Starter Solenoid
- Step-by-Step 12V Starter Solenoid Testing Procedures
- Interpreting Test Results and Diagnosis
- Troubleshooting Common Issues
- Replacement and Maintenance Tips
- FAQ