Installing a 12v starter solenoid requires careful attention to wiring connections and proper electrical safety procedures. This critical automotive component serves as an electromagnetic switch that controls the flow of current from the battery to the starter motor, making it essential for reliable engine starting performance. Understanding the correct wiring procedures ensures optimal functionality and prevents costly electrical damage to your vehicle's starting system.

Professional automotive technicians recognize the importance of proper solenoid installation for maintaining vehicle reliability. The 12v starter solenoid functions by receiving a small electrical signal from the ignition switch, which then activates a larger circuit to engage the starter motor. This electromagnetic switching mechanism prevents the need for heavy-duty wiring throughout the vehicle's cabin while providing reliable starting performance under various operating conditions.
Understanding Starter Solenoid Fundamentals
Basic Operating Principles
The fundamental operation of a 12v starter solenoid involves electromagnetic principles that create mechanical motion through electrical current flow. When the ignition key activates the starting circuit, a small current flows through the solenoid's control winding, creating a magnetic field that pulls the plunger inward. This mechanical action simultaneously closes the main electrical contacts and engages the starter drive gear with the engine's flywheel ring gear.
Modern automotive applications typically utilize a four-terminal 12v starter solenoid configuration that includes battery positive, starter motor positive, ignition switch signal, and ground connections. The solenoid housing contains both the electromagnetic coil assembly and the heavy-duty electrical contacts capable of handling the high current demands of starter motor operation. Understanding these basic principles helps technicians diagnose problems and perform proper installation procedures.
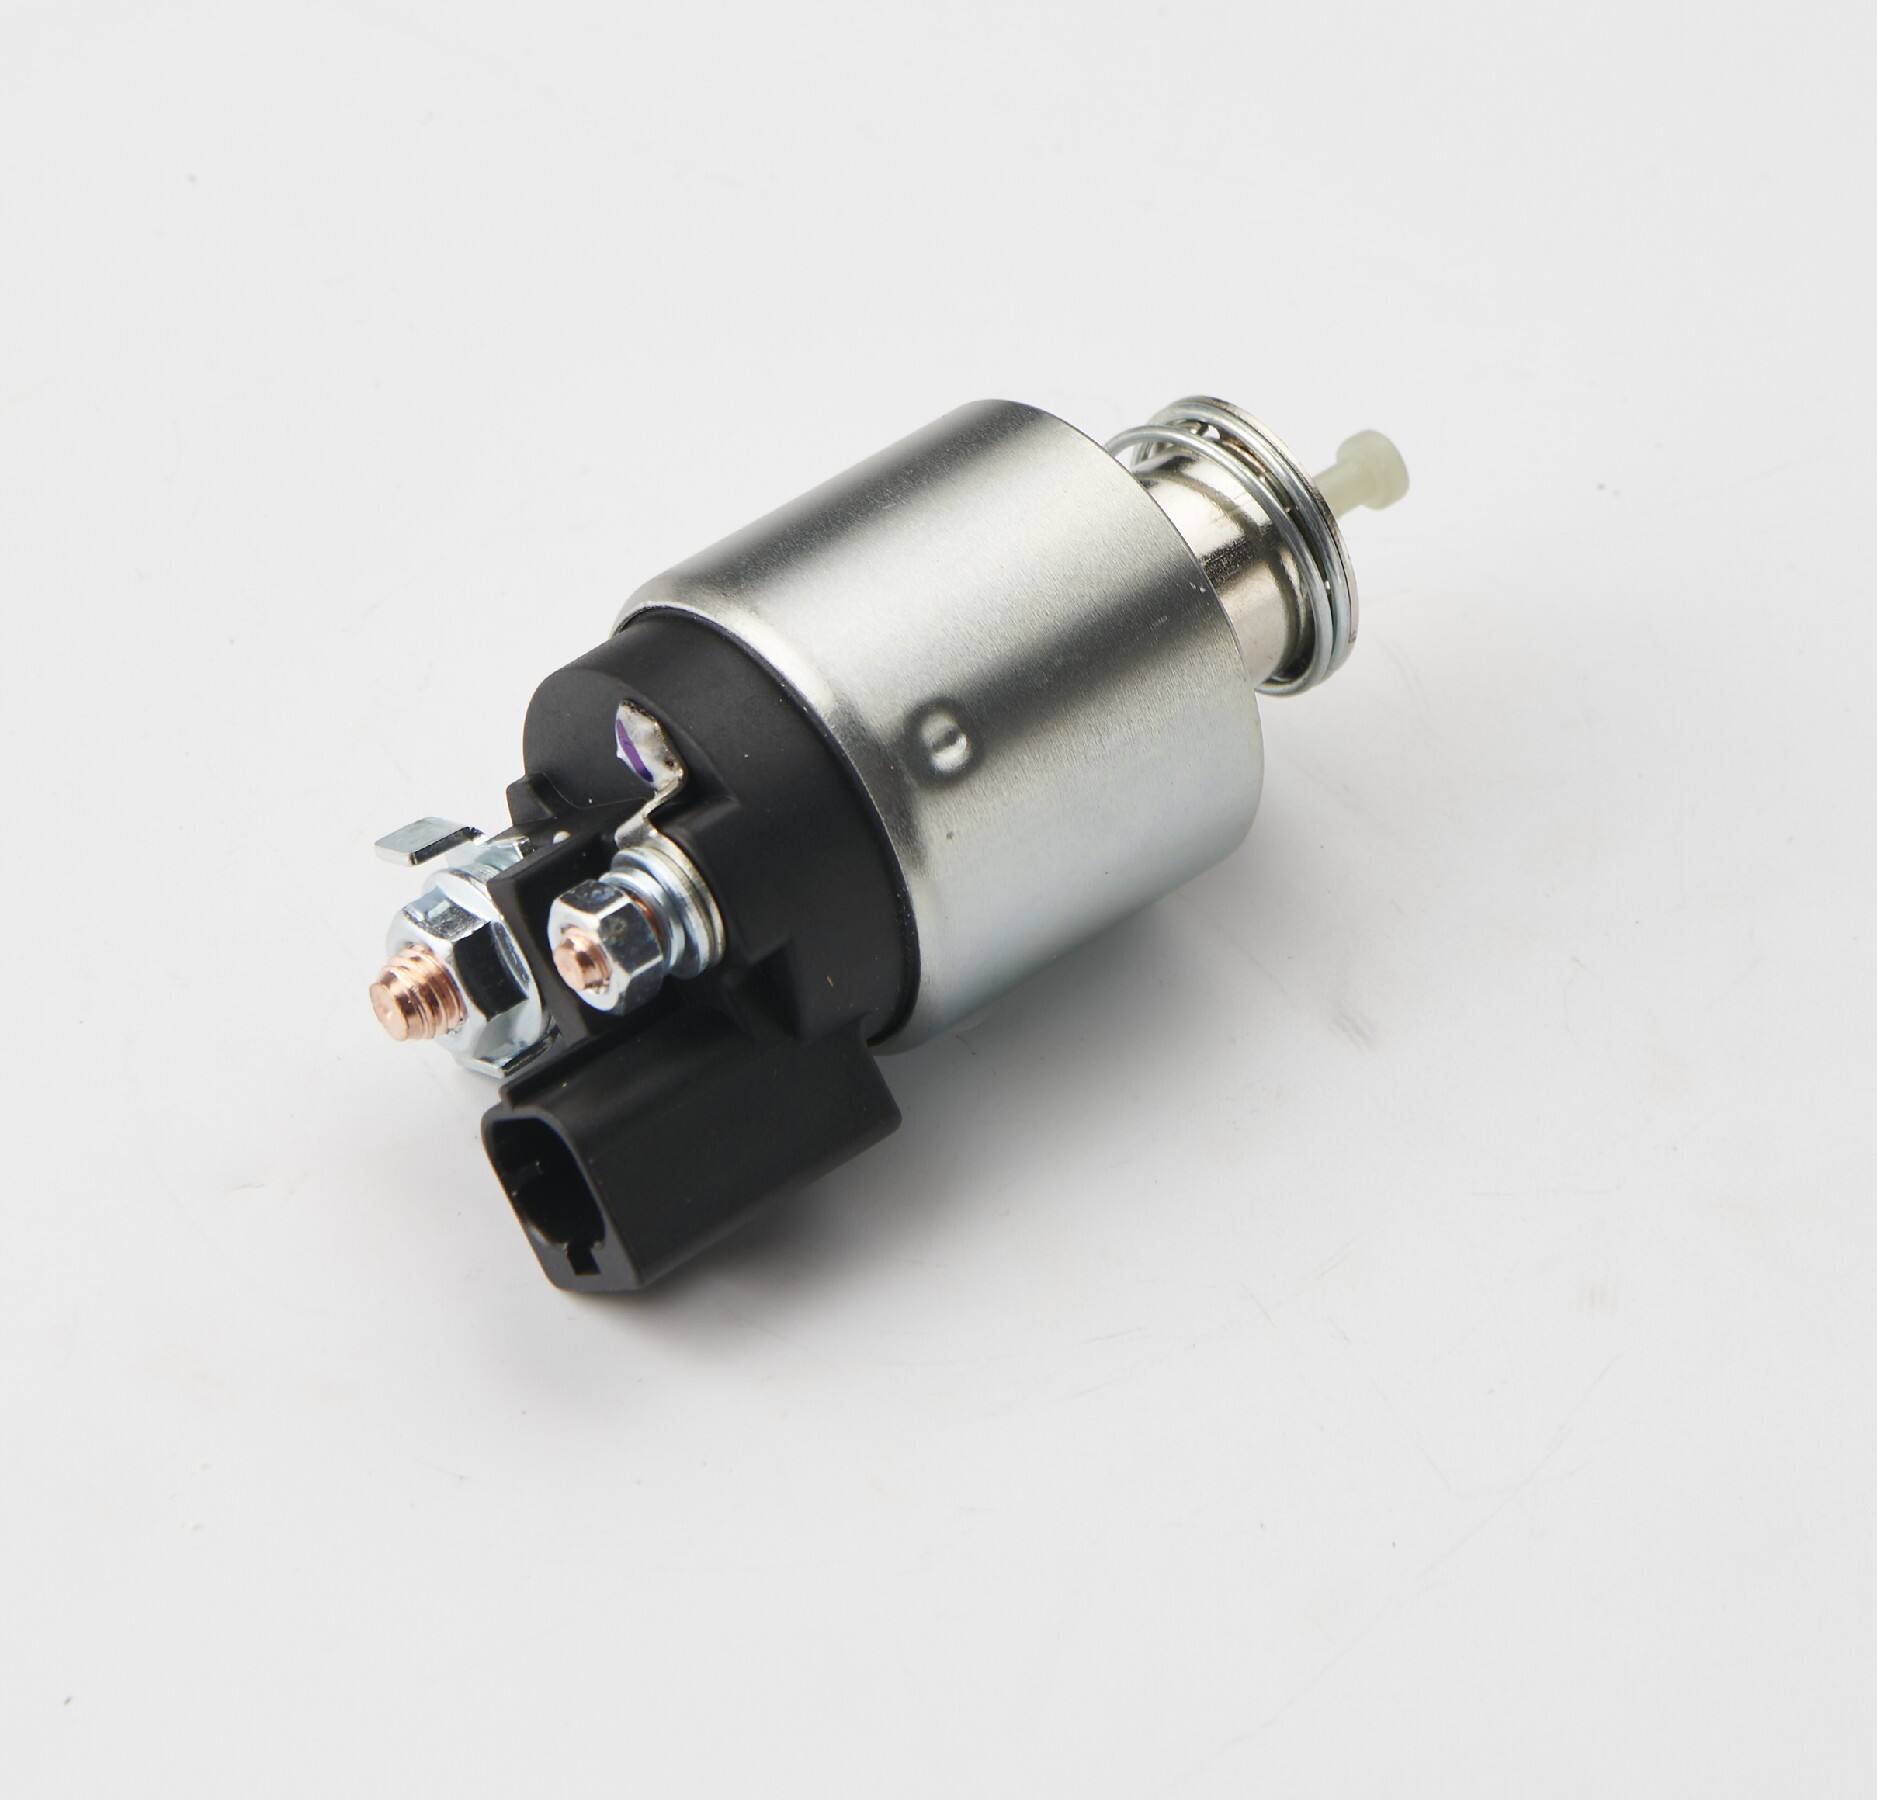
Component Identification
Identifying the correct terminals on a 12v starter solenoid prevents wiring mistakes that could damage electrical components or create safety hazards. The large terminals typically handle the main current flow between the battery and starter motor, while smaller terminals receive control signals from the ignition switch and other starting system components. Terminal markings may vary between manufacturers, making proper identification crucial before beginning any wiring work.
Quality solenoids feature clearly marked terminals with standard automotive electrical symbols or letter designations. The battery terminal usually connects to the largest wire from the positive battery cable, while the starter terminal connects to the heavy cable leading to the starter motor. Control terminals receive smaller gauge wires from the ignition switch circuit and may include additional connections for bypass circuits or safety interlocks.
Professional Wiring Techniques
Safety Preparations
Proper safety procedures must be followed before beginning any 12v starter solenoid wiring work to prevent electrical shock, short circuits, or component damage. Disconnecting the negative battery cable eliminates the risk of accidental short circuits while working with electrical connections. Wearing safety glasses and insulated gloves provides additional protection against potential sparks or electrical contact during the installation process.
Working in a well-lit area with proper tools ensures accurate wire connections and reduces the likelihood of mistakes that could damage expensive electrical components. Having a multimeter available allows for circuit testing and voltage verification before energizing the newly installed solenoid. Professional technicians also recommend having fire suppression equipment nearby when working with automotive electrical systems due to the potential for sparks or overheating.
Wire Routing and Connection Procedures
Proper wire routing protects electrical connections from heat, vibration, and mechanical damage that could cause starting system failures. The main battery cable should follow the shortest practical path while avoiding contact with hot engine components, sharp edges, or moving parts. Securing cables with appropriate clamps and grommets prevents chafing and maintains proper electrical connections over the vehicle's service life.
Control wire connections require careful attention to prevent signal interference and ensure reliable operation under all conditions. These smaller gauge wires should be routed away from high-current cables and ignition system components that could induce electrical noise. Using proper electrical connectors with adequate current ratings prevents overheating and voltage drop issues that could affect starting performance.
Installation Best Practices
Mounting Considerations
Selecting the proper mounting location for a 12v starter solenoid affects both performance and service life of the component. The solenoid should be mounted in a location that provides easy access for maintenance while protecting it from excessive heat, moisture, and vibration. Many vehicles have designated mounting brackets specifically designed for solenoid installation that provide optimal positioning and support.
Proper grounding is essential for reliable solenoid operation and requires a clean, secure connection to the vehicle's chassis or engine block. Using star washers or lock washers prevents ground connections from loosening due to vibration and thermal cycling. The mounting surface should be clean and free of paint or corrosion to ensure good electrical contact and proper heat dissipation.
Terminal Connection Sequence
Following the correct connection sequence when installing a 12v starter solenoid prevents accidental short circuits and ensures proper system operation. Begin by connecting the ground wire to establish a reference point for all other electrical connections. Next, attach the main battery cable to the designated battery terminal, followed by the starter motor cable to the appropriate output terminal.
Control wire connections should be made last to prevent accidental solenoid activation during the installation process. These connections typically include wires from the ignition switch, neutral safety switch, and any other starting system interlocks. Using dielectric grease on electrical connections helps prevent corrosion and ensures reliable electrical contact over extended service periods.
Testing and Verification Procedures
Initial System Checks
Before attempting to start the engine with a newly installed 12v starter solenoid, performing systematic electrical tests verifies proper installation and prevents potential damage to starting system components. Using a multimeter to check continuity between terminals ensures all connections are secure and properly made. Voltage measurements at various points in the circuit help identify any wiring errors or connection problems.
Testing the solenoid's mechanical operation without engaging the starter motor allows verification of proper electromagnetic function. This can be accomplished by applying battery voltage to the control terminal while monitoring the main contacts for proper closure. A distinct clicking sound should be heard as the solenoid activates, indicating normal mechanical operation of the internal components.
Operational Verification
Once initial electrical tests confirm proper wiring, operational testing verifies that the 12v starter solenoid functions correctly within the complete starting system. This involves attempting to start the engine while monitoring various electrical parameters to ensure normal operation. Voltage drop measurements across connections help identify any resistance problems that could affect starting performance.
Successful operational testing includes verifying that the solenoid disengages properly when the ignition key is released, preventing continuous starter motor operation that could damage the engine or starting system. The solenoid should also function reliably under various temperature conditions and battery voltage levels that may be encountered during normal vehicle operation.
Troubleshooting Common Issues
Connection Problems
Poor electrical connections represent the most common cause of 12v starter solenoid problems and can manifest as intermittent starting issues or complete starting system failure. Loose terminal connections create resistance that causes voltage drop and heat generation, potentially damaging the solenoid contacts over time. Regular inspection and maintenance of all electrical connections helps prevent these problems from developing.
Corrosion at terminal connections can also cause similar symptoms and requires thorough cleaning to restore proper electrical contact. Using appropriate electrical contact cleaners and applying protective coatings helps prevent future corrosion problems. Overtightening terminal connections can damage the solenoid housing or strip threads, while undertightening allows connections to loosen over time.
Performance Diagnostics
Diagnosing 12v starter solenoid performance issues requires systematic testing to isolate the problem from other starting system components. Voltage measurements at the solenoid terminals during attempted starting help determine whether the problem lies with the solenoid itself or with the control circuits. Proper diagnostic procedures can prevent unnecessary component replacement and reduce repair costs.
Current draw measurements provide valuable information about solenoid condition and can reveal internal problems such as worn contacts or coil issues. Comparing measured values to manufacturer specifications helps determine whether replacement is necessary or if other system components require attention. Understanding normal operating parameters for the specific solenoid type ensures accurate diagnostic results.
Maintenance and Service Requirements
Preventive Maintenance Schedules
Regular maintenance of a 12v starter solenoid extends service life and prevents unexpected starting system failures. Visual inspection of all electrical connections should be performed during routine vehicle maintenance to identify signs of corrosion, looseness, or damage. Cleaning terminals and applying appropriate protective coatings helps maintain reliable electrical connections over extended periods.
Testing solenoid operation periodically allows early detection of potential problems before they cause complete system failure. This includes measuring voltage drop across connections and verifying proper mechanical operation of the solenoid plunger. Maintaining detailed service records helps track performance trends and schedule replacement before failure occurs.
Replacement Criteria
Determining when to replace a 12v starter solenoid requires evaluation of multiple performance factors and consideration of overall system reliability requirements. Excessive voltage drop across solenoid contacts indicates worn internal components that may soon fail completely. Intermittent operation or slow engagement response suggests internal problems that warrant replacement rather than continued service.
Physical damage to the solenoid housing, terminals, or mounting brackets also necessitates replacement to ensure continued reliable operation. Age and service history should also be considered, as older solenoids may fail without warning even if current performance appears adequate. Replacing aging solenoids proactively prevents inconvenient breakdowns and maintains system reliability.
FAQ
What tools are needed for 12v starter solenoid installation
Basic tools required for 12v starter solenoid installation include standard wrenches for terminal connections, wire strippers for preparing cable ends, and a multimeter for electrical testing. Safety equipment such as insulated gloves and safety glasses should also be used. Having dielectric grease and appropriate electrical connectors ensures professional-quality connections that resist corrosion and provide reliable long-term performance.
How do I identify the correct wire connections on a starter solenoid
Most 12v starter solenoid units feature clearly marked terminals indicating their function within the starting circuit. The largest terminals typically handle main current flow between battery and starter motor, while smaller terminals receive control signals from ignition switch circuits. Consulting the vehicle's wiring diagram or solenoid manufacturer specifications ensures correct identification and prevents wiring mistakes that could damage electrical components.
What causes a starter solenoid to fail prematurely
Common causes of premature 12v starter solenoid failure include poor electrical connections that create resistance and heat, exposure to excessive moisture or contamination, and mechanical stress from improper mounting. Electrical overload from faulty starter motors or incorrect wiring can also damage solenoid contacts. Regular maintenance and proper installation techniques significantly extend solenoid service life and prevent unexpected failures.
Can I test a starter solenoid without removing it from the vehicle
Yes, most 12v starter solenoid testing can be performed without removal using standard electrical test equipment. Voltage measurements at terminals during operation help identify internal problems, while continuity testing verifies proper contact closure. However, some advanced diagnostic procedures may require solenoid removal for bench testing to fully evaluate internal component condition and mechanical operation parameters.